When you need to create a table in Databricks, you've got three main ways to get it done: using the visual UI for quick file uploads, running SQL commands for precise control, or tapping into Spark APIs for some serious programmatic power. Each method is suited for different tasks, from fast, one-off data exploration to building robust, automated data pipelines.
Your Starting Point for Creating Tables in Databricks
Jumping into Databricks to get your data organized can feel like a lot at first, but it really just comes down to picking the right tool for what you're trying to accomplish. This guide will walk you through the three core ways to create tables, so you can stop guessing and start building.
We’ll tackle each one using a common, real-world scenario: taking a raw CSV file of customer order data and turning it into a structured, queryable table. This way, you can see exactly how each method works and decide which one fits you best—whether you're an analyst who loves a good UI or an engineer who lives in code.
Understanding the Core Methods
Before we get into the nitty-gritty, let's quickly break down the strengths of each technique. The best choice often depends on your own comfort level with code, how complex the job is, and whether you're doing a one-time upload or setting up something that needs to run every day. If you're just getting your environment set up, you might also want to check out our guide for configuring an MCP Databricks server.
Here's a quick look at what each method brings to the table:
- The Databricks UI: This is your best friend for quick, ad-hoc tasks or if you're just getting started. It’s a completely guided, code-free way to upload files and get a table created in minutes.
- SQL Commands: Perfect for data analysts and anyone comfortable with SQL. Writing a
CREATE TABLEstatement gives you repeatable and precise control over your table’s schema and properties. - Spark APIs (PySpark/Scala): This is the powerhouse option for data engineers. It lets you perform complex transformations on your data before writing it out as a table, which is essential for building automated ETL jobs.
Choosing Your Databricks Table Creation Method
Still not sure which path to take? This little table should help you decide which method aligns best with your immediate needs.
| Method | Best For | Key Advantage |
|---|---|---|
| Databricks UI | Beginners, one-off file uploads, and quick data exploration. | Simplicity. It's a visual, step-by-step process with no code required. |
| SQL Commands | Data analysts, defining precise schemas, and creating repeatable setups. | Control. You get exact, declarative control over the table structure. |
| Spark APIs | Data engineers, automated data pipelines, and complex transformations. | Power & Flexibility. It's fully programmable and integrates into larger apps. |
At the end of the day, there's no single "right" way—it's all about what gets the job done most effectively for you.
By the time you're done with this guide, you’ll have the know-how to confidently create tables in Databricks using whichever method makes the most sense for your project.
Creating Tables Visually with the Databricks UI
If you're not a fan of writing code or just need to get data into Databricks quickly, the UI is your best friend. It offers a totally visual workflow to create a table without a single line of SQL. I find this approach is perfect for quick data exploration or for helping team members who aren't steeped in SQL or Spark get their hands on data.
Let's walk through a common scenario. Say you have a CSV file on your computer named product_inventory.csv.
Here’s the step-by-step practical example:
- Navigate to your Databricks workspace sidebar.
- Click + New and then select File upload.
- Drag your
product_inventory.csvfile directly into the upload area or browse your computer to select it. - Once uploaded, Databricks automatically presents a preview and a "Create Table" interface.
To get started, just head over to the Data pane in your workspace sidebar, click Create table, and then drag your file right into the upload box. It's that simple.
Navigating the Create Table Interface
As soon as your file uploads, Databricks gets to work. It automatically previews your data and takes a pretty good guess at the data type for each column. For example, it'll likely see an inventory_count column as an integer and last_updated as a timestamp.
This is your chance to step in and refine the schema before anything is finalized. Sometimes Databricks gets it wrong—maybe it reads a product_id as a number when you know it should be a string. No problem. You can easily override the data type right there in the UI. Getting this right from the start saves a lot of headaches down the road.
This is a great visual breakdown of the key decisions you'll make when defining your table's storage and ownership in the UI.
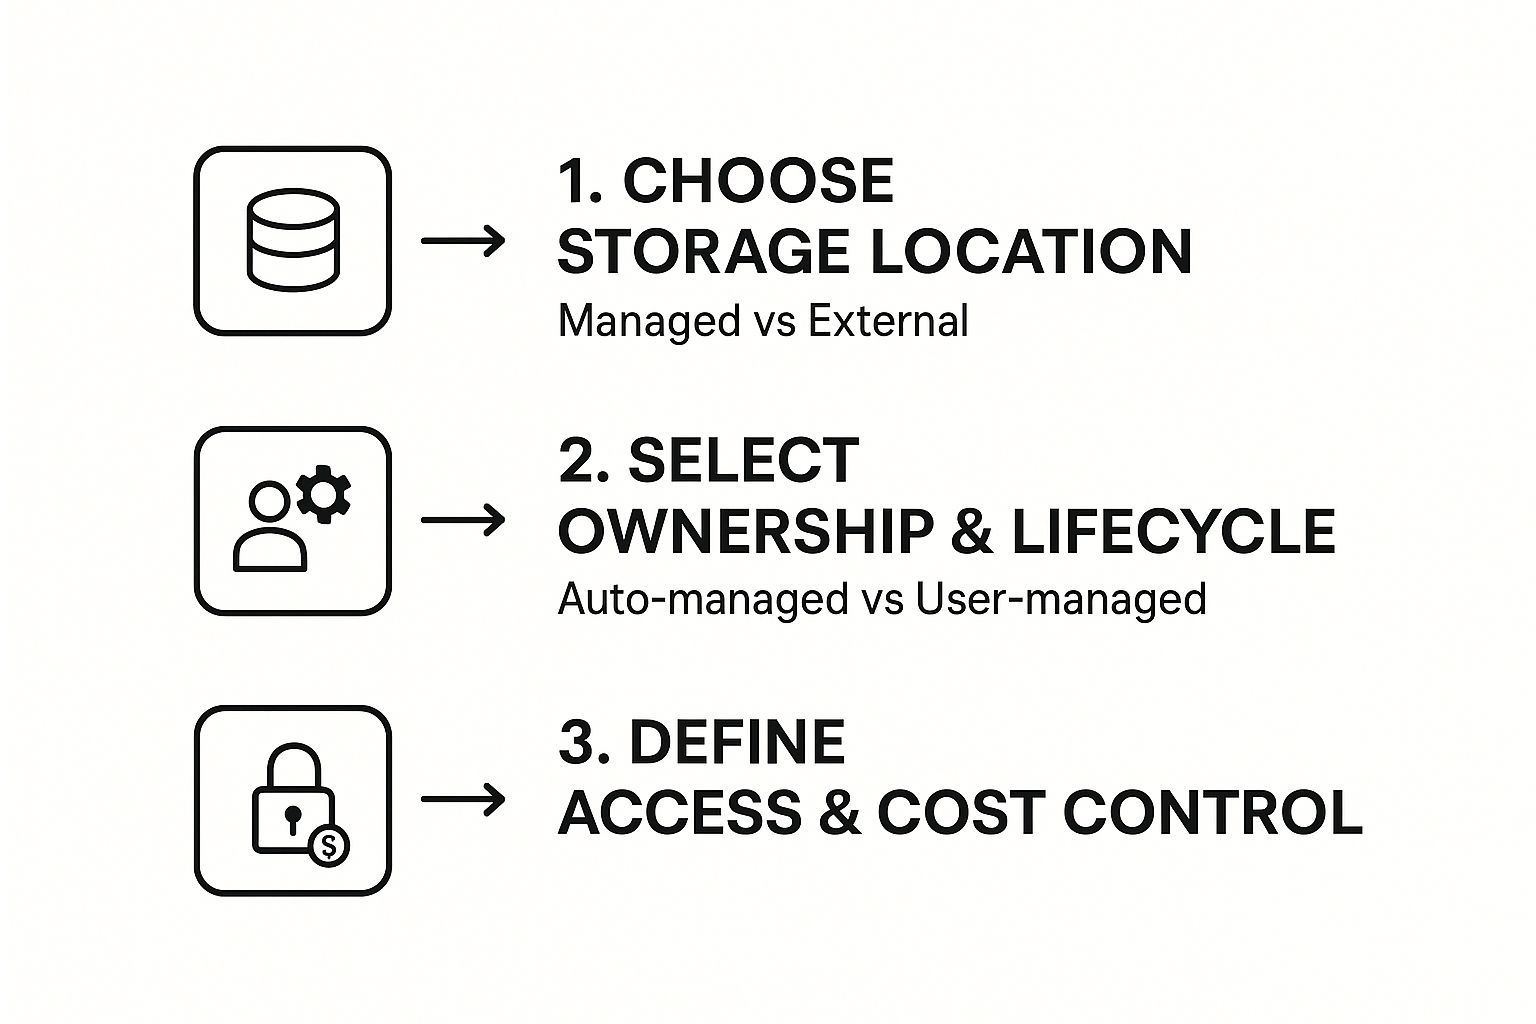
As the flow shows, your choices about where to store the data really impact how it's managed and who can access it. Finally, you'll give your table a name, like inventory_data, pick the right database (or "schema"), and hit Create. Just like that, your table is live and ready to be queried.
The UI-driven process is more than just a convenience; it's a powerful way to make data more accessible across your organization. It lowers the technical barrier to entry, empowering analysts and business users to bring in their own data without waiting for an engineer.
Having different ways to create tables is a core strength of Databricks for managing structured data. The intuitive 'Create Table' UI, in particular, is a game-changer for teams with mixed technical skills. You can find more practical tips on Databricks table creation at chaosgenius.io.
SQL: The Professional's Choice for Creating Tables
While the UI is fantastic for a quick one-off upload, real production work demands more. When you need precision, repeatability, and control, SQL is the way to go for creating a table in Databricks.
Think of a SQL CREATE TABLE statement as a declarative blueprint for your data. You can check it into version control, reuse it across different environments, and ensure absolute consistency in your data architecture. This is standard practice for any data analyst or engineer who needs to manage schemas with explicit control.
Let's say you have a stream of raw user_events landing as Parquet files in your cloud storage. Instead of messing with manual uploads, you can just point Databricks directly to that location with a simple SQL command in a notebook. It’s far more efficient, especially when you're dealing with massive datasets or building automated pipelines.

Creating Tables from Existing Files
The most common scenario is pointing a table definition to data that already exists somewhere in your cloud storage. This creates what's called an unmanaged or external table.
With an external table, Databricks only manages the metadata (the schema, table name, etc.), while you remain in full control of the underlying data files. This separation is a cornerstone of good data governance. For a deeper look into how data protocols work, our guide on the Model Context Protocol is a great resource.
Here’s a real-world example. We'll create a Delta table from a directory of Parquet files, adding a partition on the date column to make our queries run way faster.
CREATE TABLE main.mydatabase.user_events (
  event_id STRING,
  user_id STRING,
  event_timestamp TIMESTAMP,
  event_type STRING,
  event_date DATE
)
USING DELTA
PARTITIONED BY (event_date)
COMMENT 'Table for tracking user interaction events.'
LOCATION 's3://my-bucket/data/user_events/';
Key Takeaway: That
LOCATIONclause is the magic here. It tells Databricks this is an unmanaged table. If you drop this table later, only the metadata in Databricks is removed. Your actual data files in S3 are left completely untouched, which prevents accidental data loss and allows other tools to use those same files.
Defining a New Managed Table from Scratch
Sometimes, you need to set up the table structure first, before any data is ready to be loaded. For this, you create a managed table.
With a managed table, Databricks is in charge of everything—both the metadata and the data files themselves. This means if you drop a managed table, the data goes with it. Poof. Gone for good.
This approach is perfect when you know Databricks will be the only system responsible for the entire lifecycle of that data.
Here’s a practical example of creating a new, empty managed Delta table to store customer profiles, ready for your ETL job to populate it.
CREATE TABLE main.mydatabase.customer_profiles (
  customer_id LONG,
  first_name STRING,
  last_name STRING,
  signup_date DATE,
  email_address STRING
)
USING DELTA
COMMENT 'Managed table for customer profile information.';
This simple command carves out the schema, and now it just sits there waiting for data. Choosing between managed and unmanaged tables isn't a minor detail; it’s a fundamental decision that shapes your entire data strategy.
Building Tables Programmatically with Spark DataFrames
When you're building automated data pipelines, creating tables directly from the Spark DataFrame API is where the real power is. This is the go-to method for data engineers because it lets you handle all your complex transformations—like cleaning up messy data, applying business logic, or enriching records—before anything even gets written to a table. For any serious, production-level ETL or ELT job, this is the standard.
Let's say you're getting a constant stream of raw sales_transactions data dumped as JSON files. Your first move is always to get that data into a Spark DataFrame.
Here's a practical example of the initial read:
# Path to your raw JSON data in cloud storage
json_path = "s3://my-data-bucket/raw/sales_transactions/"

# Read the raw data into a Spark DataFrame
raw_sales_df = spark.read.json(json_path)

# Show a sample of the raw data to inspect it
raw_sales_df.show(5)
Once the data is loaded, the fun part begins. You can start applying whatever transformations you need. This is where you can fix janky column names, cast data types to keep things consistent, and even create new fields on the fly, all before you actually create a table in Databricks.

Writing DataFrames to Delta Tables
Okay, so your DataFrame is clean and ready to go. Now what? You’ve got a couple of solid options for writing it to a table, but the most common (and highly recommended) approach for managed tables is using saveAsTable().
This handy method does the work of registering your DataFrame as a proper table in the metastore. The second it finishes, that table is queryable with SQL.
A crucial part of any automated job is deciding how to handle existing data. The
.mode()option is your control switch. Using.mode("overwrite")will completely replace the table with your new DataFrame, while.mode("append")will tack the new data onto the end of the existing table.
Let’s bring this to life. We'll take our sales data, clean it up a bit, and save it as a new, partitioned Delta table. This little script shows you how to pull off the cleaning, transforming, and writing all in one clean, repeatable shot.
from pyspark.sql.functions import col, to_date

# Clean and transform the DataFrame
transformed_sales_df = (raw_sales_df
  .withColumn("transactionDate", to_date(col("timestamp")))
  .withColumnRenamed("customerID", "customer_id")
  .select("customer_id", "product_id", "amount", "transactionDate")
)

# Write the transformed DataFrame to a new Delta table, partitioned by date
(transformed_sales_df.write
  .format("delta")
  .mode("overwrite")
  .partitionBy("transactionDate")
  .saveAsTable("main.sales_data.transactions_clean")
)
This programmatic approach is really the bedrock of building tough, scalable data jobs in Databricks. It gives you complete control from start to finish.
Best Practices for Table Optimization and Management
So, you’ve created your table in Databricks. That’s a great first step, but the real work is just beginning. Think of it as building a house—the foundation is laid, but now you need to maintain it to keep it from falling apart.
Without a solid management strategy, even the most perfectly designed table will start to drag its feet as more and more data gets thrown at it. This is where a little foresight into your table's format and structure pays huge dividends down the line.
The single most important decision you can make here is to use the Delta Lake format. Seriously. It’s a game-changer because it brings ACID transactions to your data lake, which is just a fancy way of saying it prevents your data from getting corrupted when multiple= things are trying to write to it at once. Plus, it unlocks a ton of powerful optimization features you just don't get with standard Parquet or CSV files. Once you're on Delta, you can start layering on more specific tricks to keep your queries snappy.

Key Optimization Strategies
There are two fundamental techniques I always come back to that can drastically speed up your queries: partitioning and Z-Ordering.
First up is partitioning. This strategy physically organizes your data into different folders based on the values in a specific column. A classic example is partitioning a massive sales table by transaction_date. When someone runs a query looking for sales from last Tuesday, Databricks can just ignore every other folder and go straight to the data it needs. It’s a huge time-saver.
Next, we have Z-Ordering. This is a bit more nuanced but incredibly powerful. It works by grouping related information together within the same data files. Imagine you’re constantly filtering your data by both customer_id and region. By Z-Ordering on those two columns, you’re telling Databricks to keep all the data for a specific customer in a specific region physically close together. This massively reduces the amount of data the engine has to scan through to find what it's looking for.
Here is a practical example of running an optimization command:
-- First, ensure the data is compacted and optimized
OPTIMIZE main.sales_data.transactions_clean;

-- Next, apply Z-Ordering on frequently queried columns
OPTIMIZE main.sales_data.transactions_clean ZORDER BY (customer_id, product_id);
By combining smart partitioning with Z-Ordering, you're not just tweaking a table—you're architecting a high-performance data system from the ground up. This makes your tables incredibly efficient and responsive. For a deeper dive into building robust data systems, check out our complete guide to the Model Context Protocol (MCP).
The best part? A lot of this ongoing maintenance can now be automated. For Unity Catalog managed tables, Databricks has a feature called predictive optimization that automatically handles things like compacting small files and running OPTIMIZE commands. It intelligently identifies which tables would benefit most from a tune-up and just takes care of it, no manual intervention required. You can learn more about how predictive optimization works straight from the official docs.
Common Questions About Creating Databricks Tables
When you first start creating tables in Databricks, a few questions almost always come up. Getting these sorted out early will save you a ton of headaches down the road. Let's tackle them head-on.
One of the biggest initial hurdles is understanding the difference between a managed and an unmanaged table. I like to think of it with an analogy: a managed table is like owning a house and the land it sits on. Both are managed by Databricks. If you drop the table, the whole property—house and land—is gone for good.
An unmanaged table, often called an external table, is a bit different. Here, Databricks only manages the house (the table's schema), while you control the land (the actual data files sitting in your cloud storage). If you drop the table, the house is demolished, but the valuable land and all its contents remain untouched. This setup is perfect when you have other tools or processes that need to access that same raw data.
Making Changes and Choosing the Right Format
Okay, so what about changing things after the fact? This is another common point of confusion. What happens when you need to add a new column to your table?
Thankfully, with Delta Lake, this is surprisingly straightforward. When you're writing your DataFrame, you can just include .option("mergeSchema", "true"). This little command tells Databricks to automatically update the table's structure to accommodate the new columns, all without failing your job. For more specific edits, like renaming or dropping a column, a simple ALTER TABLE SQL command gets the job done.
Here is a practical example of using ALTER TABLE to add a column:
ALTER TABLE main.mydatabase.customer_profiles ADD COLUMN loyalty_tier STRING;
This brings us to the final big question: why should I use Delta Lake instead of standard Parquet? While Parquet is a fantastic columnar storage format, Delta Lake adds a crucial layer of reliability on top of it.
With Delta Lake, you get ACID transactions, which prevent data corruption when multiple= jobs try to write at the same time. You also get powerful features like time travel, letting you query older versions of your data. This makes your entire data pipeline significantly more robust and trustworthy.
Honestly, choosing Delta from the start isn't just an option anymore—it's a best practice for building a dependable lakehouse architecture you can actually count on.
At FindMCPServers, we're focused on providing the resources you need to build powerful AI applications. Explore our platform to discover MCP servers that can connect your LLMs to databases, APIs, and more. Learn how to get started at https://www.findmcpservers.com.