When you need to give a Python application a serious speed boost, Redis is almost always the first tool that comes to mind. The go-to library for this job is redis-py, a mature and powerful client that provides a straightforward way to connect your code to a Redis server.
This combination of Python and Redis is a favorite among developers for its sheer speed and simplicity, making it a perfect choice for high-performance applications.
Why Python and Redis Are a Perfect Match
So, what makes this duo so effective? It comes down to their complementary strengths.
Redis is an in-memory data store. Instead of writing data to a slower disk, it keeps everything in RAM. This simple design choice makes its read and write operations ridiculously fast—we're talking sub-millisecond response times.
This is a game-changer for Python developers. Python’s synchronous nature can sometimes create bottlenecks, especially when your application has to wait on slow database queries or calls to external APIs. By bringing Redis into the mix, you can offload those slow operations and make your application feel instantly more responsive. The redis-py library makes this whole process feel natural and "Pythonic."
The Power Duo in Action
The real magic happens when you see how Python and Redis work together to solve common performance problems. Redis is far more than a simple key-value store; it offers a rich set of data structures that map beautifully to real-world challenges.
A few examples really bring this to life:
- Web Application Caching: If you’re building with Django or Flask, you can store the results of heavy database queries in Redis. The next time a user requests that same data, you can pull it directly from the Redis cache in a flash, completely bypassing the database.
- Real-Time Features: Need to build a live chat or a notification system? Redis's Pub/Sub feature makes it incredibly simple. You can set up messaging channels where your Python services publish events and other services subscribe to receive them instantly.
- Distributed Task Queues: Popular tools like Celery often use Redis as a message broker to manage background jobs. Your main application can quickly hand off a time-consuming task—like processing an image or sending a welcome email—to a queue in Redis. This keeps the user-facing side of your app zippy and responsive.
Let's break down some of the most common scenarios where this partnership shines.
Common Redis Use Cases in Python Applications
This table summarizes the primary ways developers use Redis to solve common problems in Python applications, highlighting the key features that make it all possible.
| Use Case | Problem Solved | Relevant Redis Features |
|---|---|---|
| Caching | Slow database queries or API calls that degrade user experience. | SET with expiration (EX), GET, INCR, DECR |
| Session Storage | Managing user sessions in a distributed or stateless web application. | HASHES, SET with expiration (EX) |
| Real-Time Messaging | Building live features like chat rooms, notifications, or activity streams. | PUBLISH, SUBSCRIBE (Pub/Sub), STREAMS |
| Task Queues | Offloading long-running tasks to prevent blocking the main application thread. | LISTS (LPUSH, BRPOP), STREAMS |
| Rate Limiting | Preventing abuse by limiting how often a user can perform an action. | INCR with expiration (EX), PIPELINE |
| Leaderboards | Creating real-time rankings for games or competitive platforms. | SORTED SETS (ZADD, ZRANK, ZREVRANGE) |
As you can see, Redis isn't just one tool; it's a whole toolbox for building faster, more dynamic applications.
The best part about using a redis client python like
redis-pyis its efficiency. Developers often find they can achieve roughly 80% of the operational benefits with only about 20% of the development effort. This makes high-performance features accessible for projects of any size. You can learn more about this powerful dynamic at bitecode.dev.
Getting Your Python Environment Ready for Redis

Before we can start writing any Python code, we need to get our environment set up. Don't worry, this part is quick. You just need two things: Python installed on your machine and access to a running Redis server.
Your Redis server can be anywhere. A lot of developers just run it locally for testing, or spin up a Docker container to keep things clean and isolated. For production, you'll probably be looking at a managed Redis service from a cloud provider.
Installing the Python Redis Client
With the basics in place, it’s time to install the official Python client for Redis, redis-py. This is the go-to library for pretty much everyone working with Redis in Python—it's well-maintained, feature-rich, and considered the industry standard.
You can pull it in with a single pip command. I highly recommend doing this inside a virtual environment to keep your project's dependencies from conflicting with anything else on your system.
pip install redis
That one command grabs the latest stable version of the library and sets you up with everything you need to start talking to your Redis instance.
Pro Tip: Always pin your dependency versions in a
requirements.txtfile (e.g.,redis==5.0.1). This is a lifesaver. It prevents surprise breakages when you deploy your app or when another dev joins the project, because it guarantees everyone is on the exact same page.
Establishing Your First Connection
Alright, let's make sure it all works. The next step is to actually connect to Redis from our Python code. The redis-py library makes this dead simple. You just create a client instance and tell it where your Redis server lives.
The two main things you'll need are the host and port. By default, Redis hangs out on localhost at port 6379. If your server is running somewhere else, you’ll just need to plug in the correct address. For those of you working on more complex setups, checking out how to build a Python MCP server can offer some really good insights into client-server patterns.
Here's a quick script to connect and run a simple test using the ping() command.
import redis

# Create a connection to the Redis server
# Assumes Redis is running on the default host and port
try:
    r = redis.Redis(host='localhost', port=6379, db=0, decode_responses=True)

    # Send a PING command to the server
    response = r.ping()
    print(f"Connected to Redis: {response}")

except redis.exceptions.ConnectionError as e:
    print(f"Could not connect to Redis: {e}")
Run that code, and if everything is set up right, you'll see Connected to Redis: True printed to your console. The ping() method is just a basic health check—if it comes back True, you're golden.
Notice that decode_responses=True argument? It's a really handy setting that tells the library to automatically convert Redis's byte-string responses into regular Python strings, which saves you a ton of manual decoding work later.
Working with Core Redis Data Types in Python

Alright, now that you've got a connection, we can get to the fun part: Redis's data structures. A lot of people call Redis a key-value store, but I think it's more accurate to call it a data structure server.
That little distinction is everything. Why? Because choosing the right data structure for the job is what separates a sluggish, memory-hogging app from a screaming-fast one.
To make this real, let's walk through the most common data types using a simple e-commerce app as our guide. This way, you won't just see how to use them, but more importantly, why you'd pick one over another.
Using Strings for Session Management
The most basic data type in Redis is the String. Don't let its simplicity fool you; it's perfect for things like user session tokens. When someone logs into your app, you can generate a unique token, pop it into Redis, and map it back to their user ID.
Let's say a user with the ID user:123 logs in. We can generate a token, store it with the set() command, and—this is crucial—give it an expiration time of one hour (3600 seconds) so the session cleans itself up automatically.
import redis

# Connect to Redis
r = redis.Redis(decode_responses=True)

session_token = "a_very_secure_session_token_xyz"
user_id = "user:123"

# Store the session token with a 1-hour expiration
r.setex(name=f"session:{session_token}", time=3600, value=user_id)

# Later, verify the token
retrieved_user_id = r.get(f"session:{session_token}")
print(f"Token belongs to: {retrieved_user_id}")
I'm using setex() here, which is a fantastic little command that combines setting a value (set) and adding an expiration (expire) into a single, atomic operation. Now, when a request comes in with that token, one quick get() call is all you need to verify the user. Super fast.
Storing Product Details with Hashes
So what happens when you need to store something more complex, like product information with a name, price, and brand? You could store each field as a separate key (product:101:name, product:101:price), but that gets messy and inefficient fast.
This is exactly what Hashes were built for.
A Hash is basically a map of field-value pairs, which makes it perfect for representing objects. You can neatly tuck all the details for one product under a single key.
product_id = "product:101"
product_details = {
    "name": "Wireless Noise-Cancelling Headphones",
    "price": "249.99",
    "brand": "AudioPhile",
    "in_stock": "57"
}

# Store the entire product hash in one go
r.hset(name=product_id, mapping=product_details)

# Retrieve all product details at once
all_details = r.hgetall(product_id)
print(f"Product Details: {all_details}")
Using hset() to pass in a whole dictionary and hgetall() to pull it back out is so much cleaner and faster than making multiple= network trips. It’s my go-to for modeling objects in Redis.
When you're trying to model data, just think of a Redis Hash as a Python dictionary stored under a single key. This mental model makes it obvious when to reach for a Hash instead of a bunch of individual Strings, which will simplify your key schema and cut down on network chatter.
Tracking Browsing History with Lists
Next up, let's track a user's browsing history. For this, we absolutely need to preserve the order of the items they've viewed. Lists are the perfect tool for the job.
Every time a user clicks on a product, we can just add its ID to the front of their history list with lpush(). This keeps the most recently viewed items right at the beginning.
user_id = "user:123"
viewed_product_ids = ["product:101", "product:256", "product:42"]

# User views three products in order
for pid in viewed_product_ids:
    r.lpush(f"history:{user_id}", pid)

# Show the 5 most recently viewed items
recent_history = r.lrange(f"history:{user_id}", 0, 4)
print(f"Recently viewed: {recent_history}")
The lrange() command is great because it lets you grab just a slice of the list. You can easily build a "Recently Viewed" widget without ever having to load the user's entire history. It’s incredibly efficient and scales beautifully.
Counting Unique Visitors with Sets
Last one. Let's say we want to count how many unique users visited a product page today. A list would be wrong because it stores duplicates, and a simple counter won't tell us anything about uniqueness. This is a textbook use case for Sets.
A Set in Redis is an unordered collection of unique strings. If you try to add an item that's already in the set, Redis just shrugs and ignores it.
# A few users visit the product page
r.sadd("visitors:product:101:2024-10-26", "user:123", "user:456")
r.sadd("visitors:product:101:2024-10-26", "user:123") # This duplicate is ignored

# Get the total number of unique visitors
unique_visitors = r.scard("visitors:product:101:2024-10-26")
print(f"Unique visitors today: {unique_visitors}")
We use sadd() to toss user IDs into the set. Then, scard() (which stands for set cardinality) gives us the exact count of unique members instantly. This is a ridiculously memory-efficient way to handle uniqueness problems without writing any complicated logic in your application. The right redis client python library makes these powerful operations feel totally seamless.
Implementing a Practical Caching Layer
One of the absolute best reasons to reach for a redis client python library is to build a caching layer. The concept is simple, but the impact is massive: if you can avoid re-doing slow work by saving the result for a short time, your application gets a dramatic speed boost.
Think about a function that pulls user profile data. In a real-world app, this might be a complex database query or a slow call to a third-party API. To mimic this, we'll just add a time.sleep(2) to make our function artificially slow. It's a classic performance bottleneck.
Here's what that looks like before we bring Redis into the picture.
import time

def get_user_profile(user_id: str) -> dict:
    """Simulates a slow database call to fetch user data."""
    print(f"Fetching profile for {user_id} from the database...")
    time.sleep(2)  # Simulating a 2-second delay
    return {"id": user_id, "name": "Alex Doe", "email": "alex.doe@example.com"}

# First call is slow
print(get_user_profile("user:42"))
# Second call for the same user is also slow
print(get_user_profile("user:42"))
Running this code is just painful. Every single call takes a full two seconds, even when we're asking for the exact same information. This is precisely the kind of problem Redis was born to solve.
Adding a Read-Through Cache
Let's refactor this function to use a "read-through" caching strategy. It's a straightforward but incredibly powerful pattern:
- Check Redis First: Before doing any slow work, we'll ask Redis if it already has the data. This is a cache hit.
- Return if Found: If the data is in the cache, we send it back immediately. This is our fast path.
- Fetch and Store: If Redis comes up empty (a cache miss), we then do the slow work, store the result back in Redis with an expiration time, and then return it.
The next time we ask for that same data, we'll get a cache hit and a near-instant response.
This infographic lays out the basic Redis commands that make this logic work.
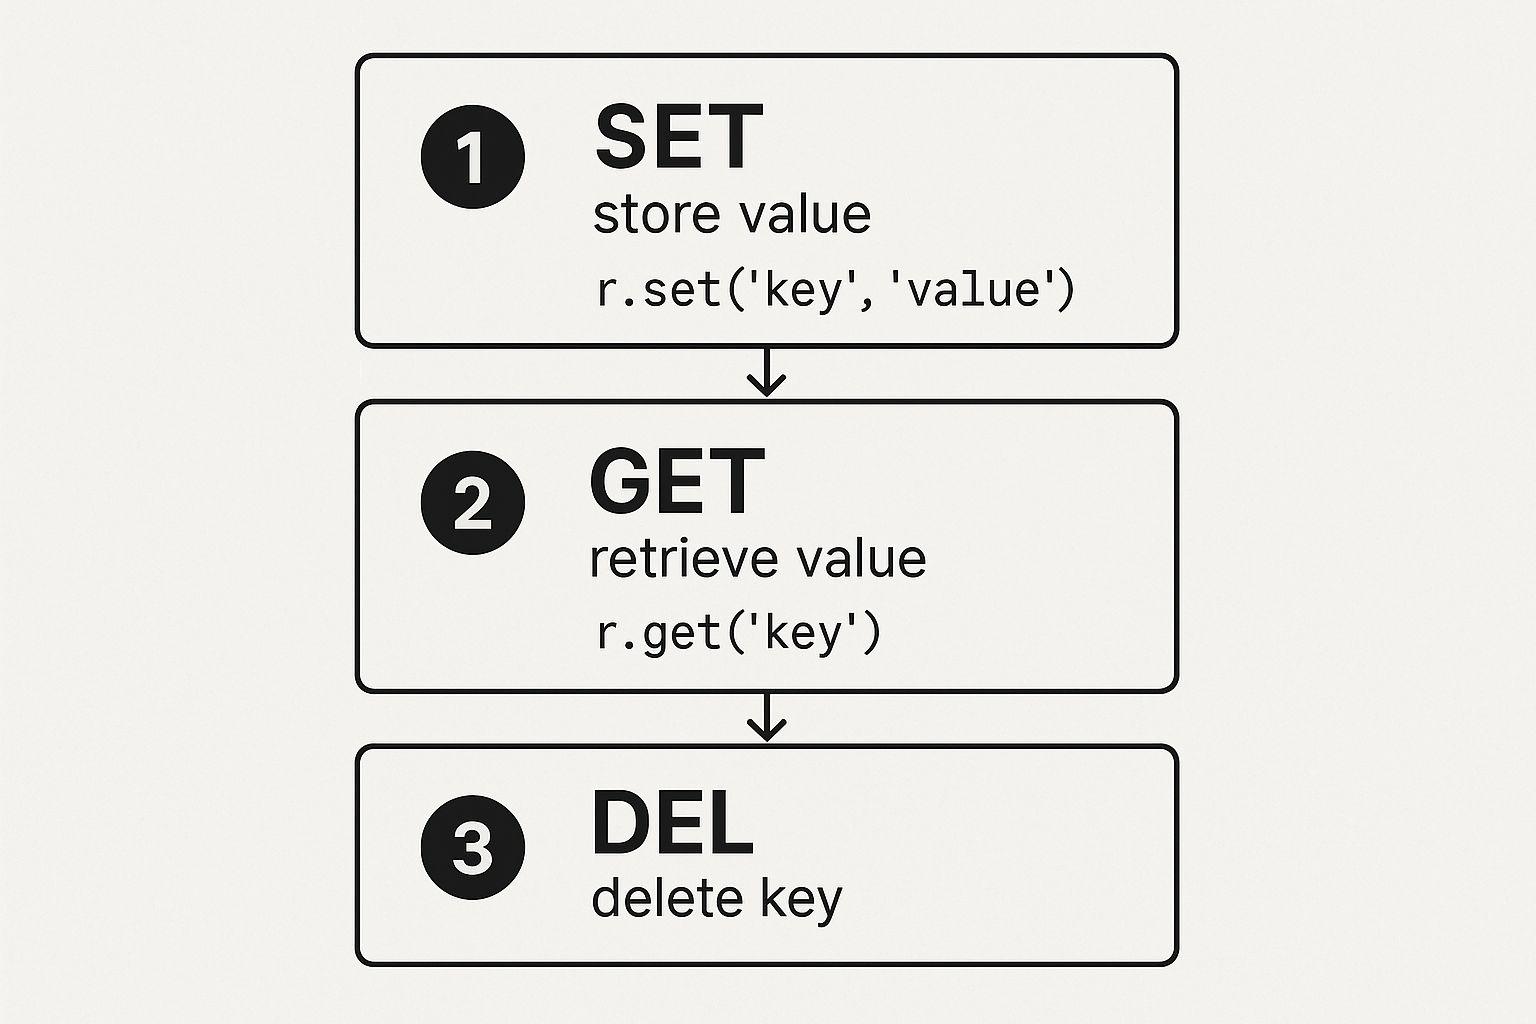
This flow shows how SET, GET, and DEL are the core building blocks for our caching system. Let's wire this up with our redis-py client.
import redis
import time
import json

# Assume 'r' is our connected Redis client
r = redis.Redis(decode_responses=True)

def get_user_profile(user_id: str) -> dict:
    """Simulates a slow database call to fetch user data."""
    # This is the original slow function from the previous example
    print(f"Fetching profile for {user_id} from the database...")
    time.sleep(2)
    return {"id": user_id, "name": "Alex Doe", "email": "alex.doe@example.com"}

def get_user_profile_cached(user_id: str) -> dict:
    """Fetches user data, using Redis as a cache."""
    cache_key = f"profile:{user_id}"

    # 1. Check Redis first
    cached_data = r.get(cache_key)
    if cached_data:
        print(f"Cache HIT for {user_id}")
        return json.loads(cached_data)

    # 2. If not in cache, fetch from source
    print(f"Cache MISS for {user_id}. Fetching from database...")
    profile_data = get_user_profile(user_id) # Call the original slow function

    # 3. Store in Redis with an expiration (e.g., 10 minutes)
    r.setex(name=cache_key, time=600, value=json.dumps(profile_data))

    return profile_data

# First call is slow (miss)
print(get_user_profile_cached("user:42"))
# Second call is instant (hit)!
print(get_user_profile_cached("user:42"))
The difference is night and day. The first call is slow because it's a cache miss, but the second one is nearly instantaneous—a cache hit! We've successfully side-stepped the performance bottleneck for any repeated requests.
Tips for Effective Cache Keys
The success of your caching strategy really hinges on how you name your keys. A good key-naming convention should be predictable, unique, and easy for a human to debug.
A simple and effective pattern is
object-type:id:field. For our example,profile:user:42is perfectly clear. This structure helps prevent key collisions and makes it obvious what's in your cache just by scanning the keys.
By using the setex() command, we also make sure our cache doesn't grow forever or start serving stale, outdated data. The Time To Live (TTL) of 600 seconds automatically kicks the key out after 10 minutes, forcing a fresh pull from the database on the next request. This is a fundamental best practice for any serious caching setup.
Exploring Advanced Redis Features

Alright, now that you've got the hang of the basic data types, it's time to dig into the features that let you build some truly sophisticated applications. This is where the redis-py library really comes alive, giving you the tools to solve complex problems with surprisingly little code.
One of the most game-changing features you'll encounter is the Pipeline.
Think about it: if you need to set ten different keys, sending ten separate commands creates ten round-trips to the Redis server. That network latency adds up fast. Pipelines are the solution—they let you bundle all those commands, fire them off in one go, and get all the replies back in a single batch.
Boosting Performance with Pipelines
The performance jump between individual commands and a pipelined approach is no joke. It's a simple change in your code that can dramatically speed up any operation involving multiple= commands.
Let's see it in action by setting 100 keys, first without a pipeline and then with one.
import redis
import time

r = redis.Redis(decode_responses=True)

# --- Without a pipeline (slower) ---
start_time = time.time()
for i in range(100):
    r.set(f"key:{i}", f"value:{i}")
end_time = time.time()
print(f"Without pipeline: {end_time - start_time:.4f} seconds")

# --- With a pipeline (faster) ---
start_time = time.time()
pipe = r.pipeline()
for i in range(100):
    pipe.set(f"key:{i}", f"value:{i}")
pipe.execute()
end_time = time.time()
print(f"With pipeline: {end_time - start_time:.4f} seconds")
The pipelined version is just so much faster because it slashes the network overhead. Honestly, this should be your default for any bulk write or read operations.
Building Real-Time Messaging with Pub/Sub
Next up is Redis's powerful Publish/Subscribe (Pub/Sub) mechanism. This is your ticket to creating real-time messaging systems—think live notifications, chat apps, or event streams—with incredible ease. The concept is simple: one client "publishes" a message to a channel, and any other clients "subscribed" to that channel get it instantly.
Here's a quick example of a publisher script that sends a message every 5 seconds. Save it as publisher.py:
# publisher.py
import redis
import time

r = redis.Redis()

channel_name = 'notifications'
message_count = 0

while True:
    message_count += 1
    message = f"New update available! (Msg ID: {message_count})"

    # Publish the message to the 'notifications' channel
    r.publish(channel_name, message)
    print(f"Published to '{channel_name}': {message}")

    time.sleep(5)
And here’s the subscriber, listening for those messages. Save it as subscriber.py and run it in a separate terminal:
# subscriber.py
import redis

r = redis.Redis()
p = r.pubsub()

# Subscribe to the 'notifications' channel
p.subscribe('notifications')

print("Listening for messages on 'notifications' channel...")
for message in p.listen():
    # Filter out subscription confirmation messages
    if message['type'] == 'message':
        print(f"Received: {message['data'].decode('utf-8')}")
This simple pattern is the foundation for building highly responsive, event-driven features into your applications. If you're diving deep into server architectures, our guide on building an MCP server for Redis explores some similar communication protocols that you might find interesting.
Key Takeaway: Connection pooling is a vital performance tuning practice. Constantly creating and tearing down connections is inefficient. A connection pool maintains a set of ready-to-use connections, drastically reducing overhead in high-traffic applications.
The Redis client ecosystem has also grown, leading to specialized management tools that are worth knowing about. For instance, redis-keys-statistics is a Python tool that analyzes key usage with incredible speed. It works by running Lua scripts directly on the server, which cuts down network I/O to almost nothing. A tool like this is a lifesaver for managing huge deployments with millions of keys where every bit of memory optimization counts. You can find more on these advanced Redis management tools on GitHub.
Common Questions About the Redis Client Python
When you start pulling Redis into your Python projects, a few questions pop up almost immediately. Getting these right from the start is a huge part of building a stable and fast application, so let's walk through the big ones.
The very first thing most developers ask is which client library they should even use. There are a few out there, but the answer is almost always redis-py.
It's the official and most popular client for good reason. redis-py is stable, keeps up with the latest Redis features, and is backed by a massive community. That means great documentation and plenty of support if you get stuck. For pretty much any project, from a simple script to a huge enterprise system, it's the gold standard.
How Should I Handle Connection Errors?
Okay, so what happens when the Redis server just... isn't there? A network hiccup or a server restart can easily crash your app if you don't plan for connection problems.
Luckily, redis-py has you covered. A simple fix is to set retry_on_timeout=True when you initialize your client. This tells it to automatically give it another shot if a command fails. For more fine-grained control, you can wrap your Redis calls in a try...except block.
import redis

# Connect to a non-existent server to trigger an error
r = redis.Redis(host='localhost', port=9999, decode_responses=True)

try:
    # This command will fail
    r.ping()
    print("Successfully connected to Redis.")
except redis.exceptions.ConnectionError as e:
    print(f"Could not connect to Redis: {e}")
    print("Falling back to default behavior or logging the error.")
    # Implement fallback logic here, e.g., return a default value
This approach lets you catch the failure and do something smart, like logging the error or serving a default value instead of letting the whole thing crash. Building in this kind of fault tolerance is a non-negotiable for production code. If you're interested in the deeper architectural patterns of client-server communication, our guide on what is model context protocol offers some great insights.
A common mistake is creating a new Redis connection for every single web request. This is extremely inefficient and will quickly bog down your application due to the overhead of establishing a new connection each time.
The right way to handle this is with a connection pool. A pool manages a set of ready-to-use connections that your app can borrow from and return to. You just create the pool once when your application fires up, and then you can reuse those connections throughout its lifecycle.
import redis

# Create a connection pool once when your app starts
pool = redis.ConnectionPool(host='localhost', port=6379, db=0, decode_responses=True)

def process_request():
    # Get a connection from the pool
    r = redis.Redis(connection_pool=pool)

    # Use the connection as usual
    user_count = r.incr('user_counter')
    print(f"Processing request for user #{user_count}")
    # The connection is automatically returned to the pool

# Simulate multiple requests
process_request()
process_request()
At FindMCPServers, we're dedicated to helping developers build smarter AI applications. Explore our platform to find the tools and servers you need to connect your models to real-world data and services. Discover MCP servers today.