Connecting Confluence and Jira isn't just a technical checkbox; it's a strategic move that creates a truly unified ecosystem for your team's work. This Confluence integration with Jira establishes a single source of truth, finally putting an end to the constant context switching and boosting transparency from project planning all the way through to execution.
Why This Integration Is an Absolute Game-Changer
Without this direct link, teams often end up working in silos. Your project plans, requirements, and meeting notes are all tucked away in Confluence, while the day-to-day development work gets tracked over in Jira. This separation forces a constant, frustrating back-and-forth, creating friction and leaving plenty of room for crucial details to fall through the cracks.
The real magic of this integration is the creation of a traceable, living link between the documentation and the actual work. Every task, bug, or feature you track in Jira can be directly connected to its origin story in Confluence.
Unifying Planning and Execution
Let's walk through a practical example. A product manager is drafting a Project Requirements Document (PRD) in Confluence. As they outline a new "user profile page" feature, they can simply highlight the description and, with a click, create a Jira story. That new story is now permanently linked to the requirements page, giving developers instant access to the full context when they start working on the ticket. No more digging through emails or asking for the latest spec doc.
This seamless workflow brings a few immediate, powerful advantages.
Key Benefits of Jira and Confluence Integration
This table breaks down the core advantages teams get when they connect these two powerful tools, showing how it impacts different parts of the project lifecycle.
| Benefit Area | Description of Impact |
|---|---|
| Workflow Efficiency | Eliminates the need to copy-paste details from a document into a ticket. The information is linked directly, not duplicated, saving time and effort. |
| Data Integrity | Maintains a single source of truth. When a requirement is updated in Confluence, anyone viewing the linked Jira issue sees the most current information. |
| Project Transparency | Stakeholders can easily navigate from a high-level project plan in Confluence down to the granular tasks being worked on in Jira. |
| Contextual Awareness | Developers and QA testers have immediate access to the "why" behind their tasks, leading to better-informed decisions and higher-quality work. |
Ultimately, this connection ensures everyone is on the same page, from the big-picture planners to the developers in the trenches.
By connecting the "why" (Confluence documentation) with the "how" (Jira tasks), you create an environment where every team member understands the full scope and purpose behind their work.
This powerful synergy between Atlassian's flagship products was no accident. Jira first hit the scene in 2002 as a dedicated issue tracker, with Confluence following in 2004 as a knowledge management hub. Integrating them was the natural next step to bridge the gap between planning and doing. In fact, Atlassian estimates this connection can slash project delays by up to 25%.
You can dive deeper into this powerful combination and see how other teams are using it over in the Atlassian Community.
Connecting Jira and Confluence for the First Time
Getting Jira and Confluence to talk to each other for the first time is the bedrock of a truly connected workflow. This initial setup, called an Application Link, is essentially the digital bridge that lets both platforms communicate, share data, and basically act as a single, cohesive system. It sounds technical, but the process is surprisingly straightforward, whether you're on Atlassian Cloud or a Data Center instance.
Think of an Application Link as a secure handshake. One tool (say, Confluence) reaches out to the other (Jira), shows its credentials, and asks to connect. Jira verifies the request, gives the green light, and the two can start sharing information. This is the heart of the confluence integration with jira.
This graphic gives you a bird's-eye view of how this crucial connection gets made.
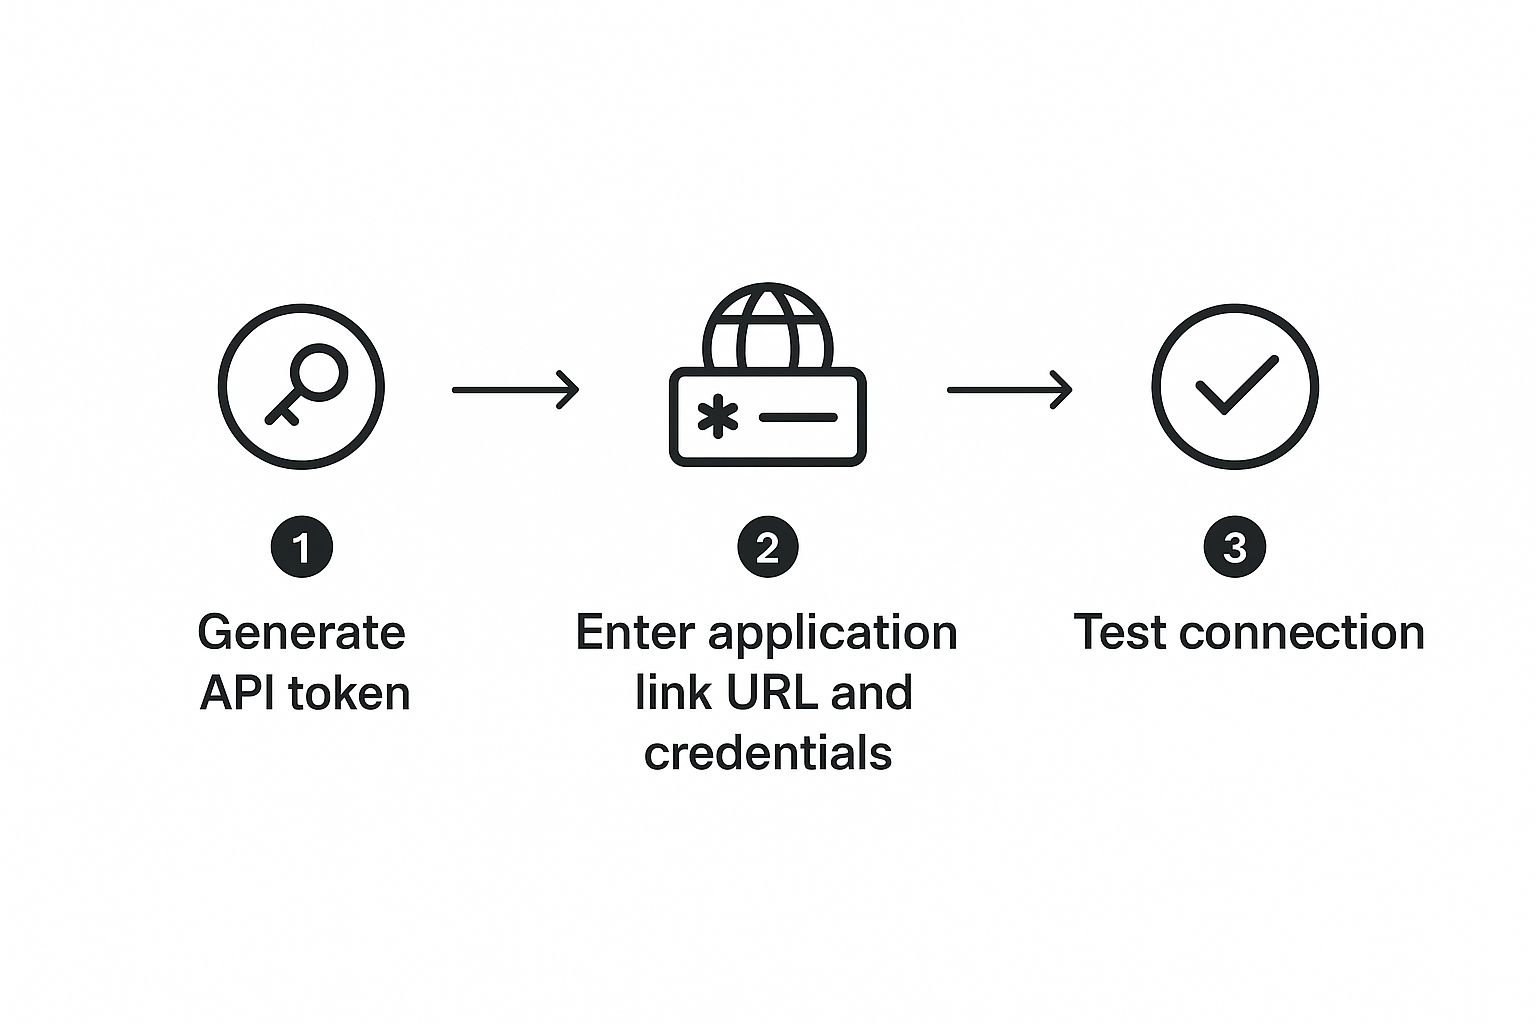
It breaks down the process into a few key phases: generating the credentials, providing the application details, and then confirming everything is connected and working.
Navigating the Setup Process
The exact clicks might vary a bit between Cloud and Data Center, but the core idea is the same. No matter which you're using, you'll be starting in your administrative settings.
If you're an Atlassian Cloud user, you're in luck—the process is usually more streamlined. You'll head to Settings > Products > Application links. From there, you just pop in the URL of your other Atlassian Cloud site, and the system walks you through a simple authentication flow.
For Data Center admins, the path is similar but might have a few more manual steps. You may need to generate and swap public keys to build that secure, trusted relationship between your self-hosted instances.
Crucial Tip: Before you even start, make sure you have full administrative permissions in both your Jira and Confluence instances. I can't tell you how many times I've seen this trip people up. It's the most common roadblock, and without admin rights on both sides of the bridge, the connection will just fail.
A Practical Walkthrough Example
Let's walk through a real-world scenario. Imagine you're the admin for a software team and need to get this link working. You'd kick things off from your Confluence admin panel.
- Initiate the Link: First, you navigate to "Application Links" in your Confluence settings. Here, you'll paste your team's Jira URL, for example,
your-company.atlassian.net. - Authenticate: Confluence will then redirect you to Jira. You'll be prompted to log in and authorize the connection, which confirms you have the authority to approve this link.
- Confirm and Finalize: After approving in Jira, you're sent back to Confluence. You should now see the Jira link listed as "Connected," meaning the bridge is built and ready to use.
The whole thing usually takes just a few minutes, but it unlocks countless hours of future productivity. It’s a tiny investment for a massive payoff in workflow efficiency.
And as you look for more ways to make your development cycle even smoother, you might find it helpful to check out the best AI developer tools that can work alongside your newly integrated Atlassian setup. With the link active, your team can immediately start embedding live Jira data right into their project pages.
Bringing Live Jira Data into Your Confluence Pages

Once you've connected Jira and Confluence, you can finally stop treating your Confluence pages like static Word documents. They're ready to become living, breathing dashboards that pull information straight from your development pipeline. This is all thanks to the powerful Jira Issues Macro, the absolute core of a good Confluence integration with Jira.
Think about it. Instead of manually copying and pasting the status of a bug fix into your meeting notes, you just embed the Jira ticket itself. When a developer moves that ticket from "In Progress" to "Done" in Jira, the status on your Confluence page updates instantly. No more stale information.
This kind of dynamic linking is a massive time-saver. I've seen teams boost their communication effectiveness by around 30% and cut down on manual reporting work by as much as 40% just by getting this right. If you want to dig into more data on this, there are some great insights on streamlining work with this integration.
Displaying Jira Data Your Way
The Jira Issues Macro is surprisingly flexible. You can slice and dice the information to fit whatever you're working on—a high-level project overview, a detailed team meeting agenda, or a quarterly roadmap.
You have three main ways to pull in the data:
- Displaying a Single Issue: This is the easiest. Just paste the URL of a Jira ticket onto your Confluence page. Confluence is smart enough to recognize it and will automatically format it into a neat summary showing the issue key, title, and current status. Simple and clean.
- Creating a List with a JQL Query: Here’s where the real magic happens. Using Jira Query Language (JQL), you can build a filtered list of issues. You could, for instance, create a table showing all high-priority bugs for the current project or every single task assigned to a specific person.
- Showing a Simple Issue Count: Sometimes, all you need is a number. The macro can display a count of issues that match your JQL query, which is perfect for dashboard metrics like "Open Bugs" or "Features Shipped This Quarter."
Building a Practical Project Dashboard
Let's walk through a real-world example. Say you're building a central dashboard in Confluence for your team's current sprint. You can use a few different macros to create a comprehensive page that updates itself.
On one page, you could easily set up:
- Open Sprint Bugs: A table generated by a JQL query like
project = "YourProject" AND sprint in openSprints() AND issuetype = Bug AND status != "Done". - Quarterly Epics: Another table pulling all epics targeted for the current quarter, giving stakeholders a quick, high-level view. The JQL would be
project = "YourProject" and issuetype = Epic and fixVersion = "Q3 2024". - Live Status Chart: You can even embed a Jira Chart macro to visualize the breakdown of issue statuses (To Do, In Progress, Done), giving you an instant health check of the sprint.
By customizing the columns in your Jira macro, you can transform a simple list of tickets into a powerful reporting tool. Choose to display fields like Assignee, Status, and Due Date to give your team all the context they need at a glance, directly within their documentation.
Creating Jira Issues Without Leaving Confluence
One of the biggest wins from a solid Confluence–Jira integration is closing the gap between discussion and action. No more wrapping up a meeting, then spending the next half hour manually creating tickets. You can turn ideas into trackable tasks right when they come up, directly from your Confluence page.
This little feature completely changes the game. Confluence stops being just a place for documentation and becomes a launchpad for your projects. Any piece of text—a technical requirement in a spec, an action item from meeting notes, or customer feedback from a brainstorm—can become a Jira issue in a couple of clicks.
Turning Text into Tasks Instantly
The process itself couldn't be simpler. Whether you're in view or edit mode on a Confluence page, just highlight the text you want to turn into a task. A small pop-up will appear with an option to create a Jira issue.
This keeps you in the flow. It’s a huge productivity boost that prevents the context-switching that absolutely kills deep work.
When you click that button, a familiar Jira creation screen appears right inside Confluence. You don't have to jump over to another tab. From this window, you can:
- Pick the Project: Route the new issue to the right Jira project.
- Set the Issue Type: Is it a Bug, Story, Task, or something custom?
- Add the Details: The text you highlighted automatically becomes the issue summary. From there, you can flesh out the description, assign it to someone, and set the priority.
Best of all, this method bakes traceability right into your process. The new Jira issue will automatically link back to the Confluence page where it was created.
This is a game-changer for context. A developer can click from a Jira ticket straight back to the original meeting notes or project plan. They immediately get the full picture—the "why" behind the work—without having to ask anyone.
A Practical Retrospective Example
Let's walk through a real-world scenario. Your team is in a sprint retrospective, and you're documenting the conversation on a Confluence page. Someone brings up a recurring deployment problem, and the team agrees on an action item: "Investigate and document the root cause of the staging environment failures."
Instead of letting that task get lost in a list of to-dos, the team lead just highlights that sentence on the page.
They click "Create Jira issue," select the "Technical Debt" project, and set the issue type to "Task." They assign it to the lead DevOps engineer and add a quick comment for extra context before hitting "Create."
And just like that, an idea from a discussion is now a tracked, assigned, and prioritized task in the team's backlog. This immediate capture ensures nothing falls through the cracks and makes your Confluence docs a living, actionable resource.
Advanced Automation and Power User Tricks

Once you've nailed the basics, you can really start to unlock some serious efficiency by automating the repetitive tasks that eat up your team's day. A powerful Confluence integration with Jira isn't just about linking pages to issues; it's about building a self-updating system that keeps everyone aligned with almost zero manual effort.
This is where you move from just being a user to becoming a power user. Instead of simply reacting to updates, you can build workflows that proactively manage information, ensuring consistency and saving hours of administrative busywork every single week.
Standardize Your Projects With Smart Templates
One of the most effective power-user tricks I've seen is creating project templates in Confluence that come pre-loaded with configured Jira report macros. This makes sure every new project starts on the right foot, with standardized reporting and a consistent structure from day one.
Imagine your product team kicking off a new feature. Instead of building a project brief page from scratch every single time, they just use a "New Feature Brief" template. This template could automatically include things like:
- A Jira Issues Macro that's already set up to show all stories tagged with the future project key.
- A Jira Chart Macro displaying a pie chart of issue statuses for that new epic.
- Clear placeholders for goals, requirements, and design mockups.
With a simple setup like this, every project page instantly becomes a functional, data-rich dashboard. It provides immediate visibility and saves the project manager from all those tedious, manual setup tasks.
Create Powerful Automation Rules
The real automation magic happens when you connect actions in one tool to trigger reactions in the other. Atlassian's automation engine is incredibly flexible, letting you build simple "if-this-then-that" rules that bridge the gap between your documentation and your development work.
The goal of advanced automation is to make your tools work for you, not the other way around. By connecting key triggers, you create a system where important updates are communicated automatically, eliminating the risk of human error and forgetfulness.
For instance, you could set up a rule where moving a Jira issue to "Done" automatically posts a comment on its linked Confluence page. This keeps stakeholders in the loop= without them ever having to leave the project plan.
Practical Automation Example
Let's build that exact rule. A team wants to notify the product manager on the Confluence requirements page whenever development on a feature is complete.
Here’s how you’d set it up in Jira Automation:
- Trigger: Start with the "Issue transitioned" trigger. Configure it to fire when an issue moves to the "Done" status.
- Condition: Then, add a JQL condition to check that the issue has a page link:
issue.properties["confluencePage"].links > 0. This ensures the rule only runs on relevant tickets. - Action: Finally, use the "Add comment to Confluence page" action, with a simple message like
Update: Development for {{issue.key}} - {{issue.summary}} is complete!.
This kind of automation has become way more seamless on Atlassian Cloud, which has driven a 25% annual growth in cloud-based integration adoption since 2021 as companies migrate from on-premise solutions. For example, FATH company saw 99.9% uptime and a 20% cost reduction after their migration, where these integrations became much more native. You can read more customer success stories to see how powerful Atlassian Cloud can be.
And just as you can connect Atlassian tools, you can find other powerful integrations across your tech stack. For example, our guide on the https://findmcpservers.com/blog/snowflake-github-integration shows how you can connect your data warehouse directly to your codebase.
Answering Your Top Jira and Confluence Questions
Even the most well-planned Confluence integration with Jira can hit a few snags. Getting out in front of the common roadblocks means your team can spend their time on actual work, not fighting with tool configurations. Let's dig into some of the most frequent questions I hear.
What Are the Most Common Permission Issues?
Nine times out of ten, permission problems are the culprit behind integration headaches. The issue almost always comes down to a mismatch between a user's access levels in Jira and their permissions in Confluence.
For example, a marketing team member might be trying to view a project status page in Confluence. If the Jira macro shows an error, it's not because the integration is broken. It’s likely because that user isn't part of the Jira project and lacks the 'Browse Projects' permission for the development project those issues belong to.
The thing to remember is that permissions aren't shared automatically. You have to make sure that user groups in Confluence have corresponding access levels in Jira for the integration to work seamlessly for everyone.
Can I Link Jira Issues to Confluence Pages Automatically?
Yes, and this is where the real magic happens. When you create a new Jira issue just by highlighting text on a Confluence page, a link pointing back to that page is automatically created inside the new Jira ticket. This gives anyone working on the task immediate context without any extra effort.
It gets better. Simply pasting a Jira issue URL onto a Confluence page will instantly transform it into a Jira Issues Macro, displaying the issue’s title and its live status.
For more advanced workflows, you can set up Jira Automation rules to trigger actions, like adding a comment to a related Confluence page when an issue’s status changes from "In Progress" to "Done." It's a fantastic way to keep stakeholders in the loop= without having to send manual updates. As AI gets more sophisticated, concepts from guides like our piece on what is model context protocol will become key to building even smarter, more intuitive integrations.
Is the Integration Different Between Cloud and Data Center?
The core functionality is pretty much the same, but the setup and day-to-day experience definitely have their differences.
-
Atlassian Cloud offers a much more tightly woven experience. The setup process is simpler because it handles a lot of the authentication behind the scenes. For example, linking
mycompany.atlassian.net/wikitomycompany.atlassian.netis a simple, wizard-driven process. Cloud instances also get new features and updates rolled out more frequently. -
Data Center, as a self-hosted solution, demands a more hands-on, manual Application Link setup. You might need to generate OAuth keys and manually copy them between your
jira.mycompany.comandconfluence.mycompany.cominstances. The interface for configuring macros can also feel a generation behind Cloud.
While both platforms give you a powerful connection, the Cloud version is generally the more straightforward path for both the initial setup and ongoing maintenance.
At FindMCPServers, we're building the next generation of AI integrations. Explore our platform to find MCP servers that connect your AI models to the tools and data you use every day. https://www.findmcpservers.com